Why Do I Need It?
Fenorri allows creating group pages. This can be used for organizing teams to keep all their group documentation, discussions and resources in one place. Groups can have members and administrators. Group membership is restricted and requires administrator approval. All groups can contain posts and resources (meaning they can have files, reports, business apps, emails, events, and some stats).Open
Open your top menu and click on the 'My Groups' item: 
You will see the page that contains (if any) groups:
There are different group categories:
- My Groups: all groups which you are part of
- Other Groups: contains groups you're not part of
- All Groups: lists all groups that exist
- I have created: will show only groups which you have created
- I'm administering: lists only those groups, which you have an admin access
Disabled: will show not published and disabled groups
To create a new group click the following button:
You will be presented with a simple form to fill out:
'Closed type' means that it will have minimum visibility to non-members. If you want to ever disable your group, simply set the 'Disabled?' option to 'Yes'.
Group Access Control
By default, you need to be a member of a group to be able to see group posts and resources. If you open a group and you are not a member of that group yet, you will see the following message:
You need to request your membership, and if approved by the group administrator, you will be notified and will be able to access group posts and resources.
Group Page
Groups contain a very simple and intuitive page:
You can edit group details by clicking the edit button:
You can invite new group members by clicking the following:
Group members will be listed inside the following container:
You can click the following button to view all members: 
Group tags are in a separate container and you can edit tags by clicking the edit button:
Editing the group icon and top page background can be performed by clicking the following button either at the icon or the background placeholders: 
Group page also contains the top menu:
You’ll find group members listed in the 'Members' section, while any new requests to join the group will be under the 'Requests' page. All your business apps, reports, files, events, and e-mails are organized in their own sections and can also be accessed through the top menu. Just above that menu, you’ll see a set of buttons that let you like, follow, share, save, add to your TODO list, and edit the group.
You can also write a new message or open an existing conversation with the group members by clicking the following button:
Adding a Resource (Reports, Business Apps, Files, and Emails)
You can add a resource to your group by simply editing the access permissions of your resource. Click your resource's access permissions, then add your group to the list: 
Your resource will appear automatically on your group page.
Group Posts
You can write a new post and attach a resource by editing and publishing your post, as you would normally do in other sections of Fenorri:
Requests to Join
All new requests will appear at the following top page menu: 
If you are the group administrator, you will see these new requests, and by opening the menu item, you will see the following:
You will be able to either accept or reject the new request by clicking on the buttons inside the end-user card.
Auto-Generated Posts
Whenever someone joins a group, the update will be published as a post on that user's profile:
Add or Remove Administrators
To add or remove administrators, select 'Members' and then click on 'Administrators' from the top page menu. You will see a page where you can easily add or remove group administrators.
Department/Group/Project Calendar
Each department, group, or project can maintain its own calendar: 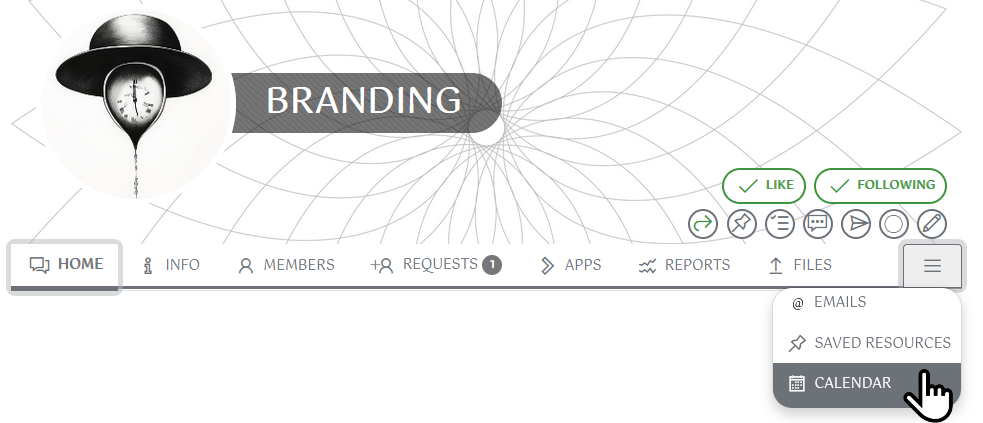
Saving Resources to Different Departments/Groups/Projects
Each department, group, or project can have its own resource boards. When saving a resource to a board, you can choose which board belongs to the specific department, group, or project where you want to save it:
Viewing Saved Resources for Departments/Groups/Projects
To access the saved resource boards for departments, groups, or projects, use the menu option below:
Was this article helpful?