Why Do I Need It?
Fenorri allows creating event pages. Events could represent a meeting, a brainstorming session, a workshop, etc. Any activity when people need to get together inside your organization can be considered as an event. Fenorri events can be used for organizing teams to keep all their relevant event documentation, discussions and resources in one place. Events can have members and administrators. Event membership is restricted and requires administrator approval. All events can contain posts and resources (meaning they can have files, reports, business apps, emails, events, and some stats).Open
Your events are listed on the calendar. If you want to view your existing events or create a new one, open your calendar from the top menu: 
You'll be able to see your events inside the calendar squares:
You can click on it to edit the settings for your event:
Inside the editing dialogue, you will be able to change your response by selecting 'Attending', 'Not attending' or 'Maybe'. You can also set your online status for that event so that the system will automatically display the status you've selected (e.g. 'Busy').
To create a new event, select the following option from the left side of your calendar page:
You will be presented with a form to fill out:
Basic information
This section contains the basic details about your event.
Date & time
Under this section, you can specify when the event will start and, if it's an 'all day' event and if it will be repeated.
How to attend?
Here you can insert the instructions on how to attend the event.
Additional information
The event category can be specified from the drop-down list and helps people to understand what the even is really for. Sometimes you need to specify your event dress code. In case it's a public, closed, secret, or 1-on-1 event, you can select your event's type in the drop-down list. Secret events will not be visible to non-attendees.
Who needs to attend?
Sometimes it will be important to specify if the event is compulsory or not to attend. Alternatively, you can invite people to attend the event by inviting everyone, or specifying who do you like to invite. You can invite individual people, groups, departments. You can list who must attend the event by filling in user names under the section 'The following people are compulsory to attend'. You can also specify if it is optional and not compulsory for certain people to attend the event (e.g. your marketing manager may attend your sales meeting, but it is not compulsory though).
Configuration
Inside the configuration section, you can configure how this event should function. For instance, you might not want your attendees to invite other people. You can publish or cancel your event. You can also limit who can view your event's content.
Event Access Control
If you open an event which you have been invited to attend, you will see the following options at the top of the screen (and you may choose to select one of them):
By default, you need to be a member of an event to be able to see event posts and resources. If you open an event you are not a member of that event yet, you will see the following message:
You need to request your membership, and if approved by the event administrator, you will be notified and will be able to access event posts and resources.
You can configure your event to be a secret one:
In case anyone tries accessing your secret event directly (e.g. they someone managed to obtain its URL), they will not see any event information, and instead will be presented with the following message:
Event Page
Events contain a very simple and intuitive page: 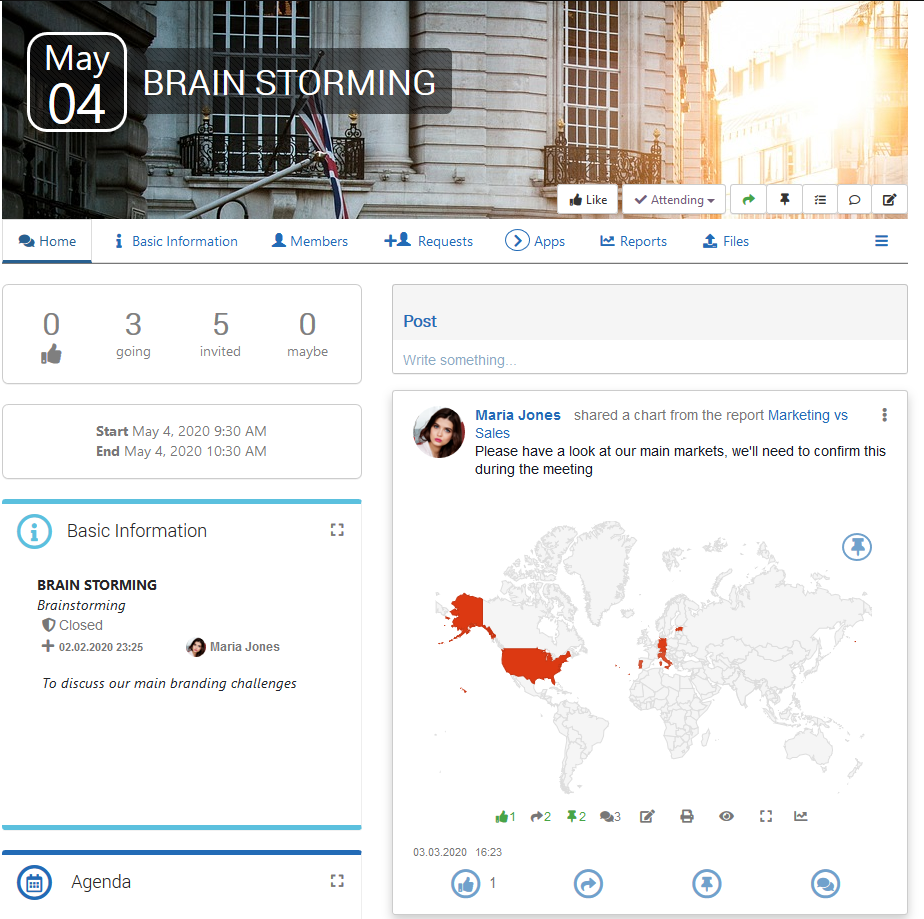
You can edit event details by clicking the edit button:
You can invite new event members by clicking the following:
Event attendees will be listed in the following container:
You can click the following button to view all members: 
The system will have similar containers to list people who have been invited, those who are not going, people who will probably come, and pending invitations.
Event tags are in a separate container and you can edit tags by clicking the edit button:
Editing the event icon and top page background can be performed by clicking the following button either at the icon or the background placeholders: 
The event page also contains the top menu:
Event members will be listed under the 'Members' section. New requests to join an event are under the 'Requests' page. Business apps, reports, files, events, and emails are all under their sections and can also be accessed via the top page menu. Above the top menu, you will find a set of buttons that can be used to like, follow, share, pin, add to TODO List, and edit the event.
You can change your 'attending' status by selecting one of the following:
You can also write a new message or open an existing conversation with the event members by clicking the following button:
Adding a Resource (Reports, Business Apps, Files, and Emails)
You can add a resource to your event by simply editing the access permissions of your resource. Click your resource's access permissions, then add your event to the list: 
Your resource will appear automatically on your event page.
Event Posts
You can write a new post and attach a resource by editing and publishing your post, as you would normally do in other sections of Fenorri:
Requests to Join
All new requests will appear at the following top page menu: 
If you are the event administrator, you will see these new requests, and by opening the menu item, you will see the following:
You will be able to either accept or reject the new request by clicking on the buttons inside the end-user card.
Auto-Generated Posts
Whenever someone accepts to attend an event, the update will be published as a post on that user's profile:
Add or Remove Administrators
To add or remove administrators, select 'Members' and then click on 'Administrators' from the top page menu. You will see a page where you can easily add or remove event administrators.
Was this article helpful?