
Business Apps Made Easy
Fenorri allows creating and instantly publishing business apps. Business apps are 100% code-free, meaning you don't need to write a single line of code or script to have a business app.
Business Apps Execution Platform
Business Apps Editor
Business Case: For instance, you want to create a business app that will collect customer information, automatically generate an invoice, send the invoice to the customer via email, and inform your sales department that a new invoice has been generated and sent. You can instantly create such a business app, without having to write any code, and you can publish it so that you and other people can immediately start using the app. If at any point you need to change the business logic of your app, you can open it in the editor and apply any changes immediately. This flexibility allows saving tones of money and time, not to mention your organization becomes agile, quick, competitive, and efficient. The benefits are endless, and you should start discovering you Fenorri Business Apps can be used to solve your top priorities challenges in your business!
Open
Open your top menu and click on the 'Apps' item:
You will see a board with business apps (if you have any, otherwise the board will be empty at first):
The Business App Card
Your business apps are presented as cards inside the system:
This makes it easier to store, share and manage your business apps.
Add a Comment
You can add comments to a business app. Simply click the comments button: 
Your comments can include text and URLs. You can mention other people and add emoji. You can also attach other resources (such as other reports, business apps, files, emails, etc). Open your resource (full screen) and start typing in your comment, as shown below:
You can include your colleague's names by typing in the @ symbol and then start typing in their name (e.g. @pete), then select your colleague's name from the list. You can also attach a resource into your comment by pressing the following button 
A dialogue window will appear where you can select the type of resource you want to attach: 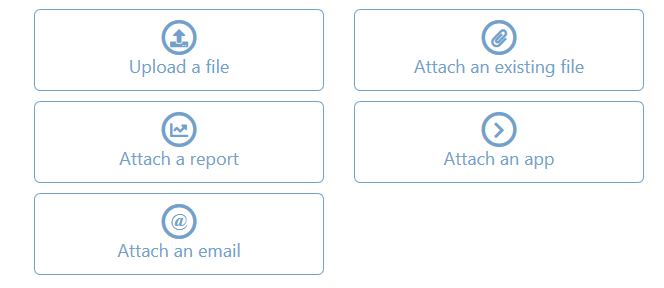
For instance, you can attach a report when answering someone's comment. Please note, you can attach only resources you have access to.
Add to TODO List
You can add a business app to your TODO list by clicking on the following card drop-down menu option:
You will be able to instantly view your new item inside your TODO list by selecting it at the top menu. In case you need to view and manage your TODO list, click the 'See all' button at the bottom of the drop-down menu.
Saved Resources
You can save a business app to a board by clicking on the following button:
Then you can select your board from the list of available boards (otherwise you will need to create a board before you can save a resource).
Share
You can share your business app by pressing the share button:
Then you can select where you would like to share your resources (e.g. your won timeline, a group, etc.), add a message (tag people, add a location, express an emotion, etc.), and click the share button.
Unpublish
You can unpublish a business app. This will not archive it, neither delete, but just will mark it as 'unpublished' and will remove it from the main view where only published business apps are shown. This is a handy feature in case you just want to temporarily remove the business app, but not archive or delete it. To do so, simply click the 'Unpublish' option from the drop-down menu.
View Not Published Apps
You can view the business apps which are not published by selecting the following option from the top navigation of the page:
Why Do We Have Published and Archived Business Apps?
To ensure you don't accidentally delete a business app, we've introduced this feature where you can just 'unpublish' a business app, and it will hide it from various views. To delete any business app forever, you need to archive it first, and only then you will be able to delete a business app. This procedure is meant to make it harder to accidentally delete a business app, but easy enough to follow this practice, which will potentially ensure you never lose your business apps.
Archive
Just click on the drop-down menu and select 'Archive'. Your business app will be archived and you can then view it at the archive section by clicking the following button: 
Remove From Archive
If a business app is archived, you can remove it from the archive by selecting the following option:
Delete Forever
After archiving a business app, you can delete it forever. Just click on the drop-down menu and select 'Remove'. Your business app will be deleted from the system.
View Logs
To view the activity logs for your resource, simply click on the drop-down menu and select 'View Logs':
You will see a page with all your resource's log records. You can export your logs by click the 'Export to Excel' button.
Keep an Eye
In case you would like to receive notifications on a business app (e.g. someone comments the resources, it gets deleted, etc), you can click the following button and start receiving notifications automatically.
View Auto-Generated Files
View Apps 'In Progress'
View Apps 'In Progress'
You can drop your business app at any point by simply closing it. You can then re-start it from the point you have dropped it by selecting the following menu: 
View Successfully Completed Apps
Click the following button to browse through your completed apps: 
Error
If you had any apps that were completed with errors, click the following button: 
View Scheduled Apps
To view your scheduled apps, click the following menu item: 
View Canceled Apps
If any of your apps were canceled, click the following button: 
Search Apps
Click the following button and start searching: 
Sort Apps
That means that if we did the following: 
Run
To start executing your business app, click the following button:
Pause & Resume
You can drop your business app at any point by simply closing it. You can then re-start it from the point you have dropped it by selecting the following menu: 
Then you need to resume your business app (and it will simply continue from the point you left it before) by pressing the following button:
Cancel a Running App
You can cancel your currently paused app by pressing the following button:
Attach Business Apps Inside Fenorri Messenger
Inside the messenger, open a conversation and click the 'Attach' button.
Select the 'Attach an app' option:
You will get a list of available business apps, then click the button at the bottom of the card:
That's it, your business app should be displayed inside the conversation:
Attach to a Post
To include a business app inside your post, simply start writing a post and click on the 'Attach' button:
Select the 'Attach an app' option:
You will get a list of available apps, then click the button at the bottom of the card:
Once you finish writing your post, click the 'Post' button. Your post will be published with the business app inside.
Fenorri Business Apps Editor
Fenorri Business Apps Editor is used for creating and editing business apps. It consists of a flow-chart-like editor, where you can drag-and-drop different building blocks to create a business app. You can immediately publish it, and it will become available for you and others to execute. To create a new business app, click the following button:
To edit an existing business apps, click the 'Edit' button:
Regardless if you are editing an existing business app or create a new one, it will open the business app editor for you. This is the place where you can edit or create business apps.
How Does the Editor Work?
You can drag-and-drop building blocks into the editor, e.g.:
You need to have the 'Start' and the 'End' block inside your diagram to indicate where does your app start and where does it finish. Your blocks must be connected to indicate the business logic flow inside your app. To connect two blocks, simply connect their endpoints with your mouse, e.g.:
If you need to remove a connection, simply click on it. There can be only one connection from one endpoint. To configure a block, simply click on it, and on the right side you will see your block's properties, e.g.:
How Come I Don't Need To Write Any Code?
Thanks to the editor, you don't need to write any code or scripts to create a business app with any kind of business logic supported by the editor controls. You simply drag-and-drop your blocks, connect and configure them. The system will write the code for you in the background and make it instantly available for executing as a business app. This allows you to rapidly create your business logic inside an app, and then if you need to, you can easily change it. This makes your apps transparent since everyone with access can open the app in the editor and view its business logic. That's a big win for your colleagues, since everyone willing to contribute, can open your app and improve it.
General Settings
To configure your business app, click the following menu option:
In the following section you can type in your business app's title and its description:
Publish Your App Inside The Editor
To publish your business app, enable the following option (alternatively disable it if you don't want your business app to be published):
Archive Your App Inside The Editor
To move your business app to/from the archive, enable or disable the following option:
All Versions
The following section contains all previous versions of your business app:
You can always load a previous version by clocking the 'Load' button. It will be simply loaded into your editor, and will not replace the current version. If you wish a previous version to replace your current one, load it first and then save it.
Temporary Saved
This section may contain temporarily saved versions of your process. The system may save automatically your temporary versions, and is served to you as a backup. For instance, you may have errors invalidating your business app. The system will automatically save your version here, and in case you need to re-open it, later on, you can retrieve it from this place:
In order to load a temporarily saved version, click the load button next to the version you wish to load:
Tags
Your business app can contain tags. This makes it easy to categorize your business app and can be later used for searching and sorting. You will see a section that can contain business app tags.
Business Apps Cover
Your app card can contain a cover, making it easier to view your business app inside various pages, e.g.:
You can set your business app cover by first clicking the following button at the top of your page:
On the right side of your page, scroll down until you see the following section:
You can set an image by clicking the 'Browse' button. Alternatively, you can set an icon/character with a background color.
Business Apps Editor Buttons
The editor allows you to perform various operations using the buttons located at the bottom of the editor.
Clear Your Editor
You can clear the contents of your editor by pressing the following button: 
Validate Your App
You can validate your app any time by pressing the following button: 
If it finds any errors, they will be displayed at the top of the editor.
Save As
You can save your app as new by clicking the following button: 
Read the next section to learn about what rules will be applied when saving an app.
Save
You can always save your app by clicking the following button: 
Please note, it will validate it first, and if it finds any errors, it will display them at the top of the editor.
In case your app is a published one (i.e. you have enabled the 'Published app' option in the configuration), it will not save your business app. Instead, it will save it as a 'temporary version', which you can always load if you need to.
The reason it works this way is to disable faulty apps to be published. By saving an app that is configured to be a published one, you must have a valid business app, so that anyone can run it instantly.
If you publish an app that has errors, people will not be able to successfully execute it.
Alternatively, you can make it not to be a published app, and save it. In any case, the system will automatically save it as a temporary app
Create New
You will only see this button when creating a new app: 
Read the previous section to learn how you can save your app.
Change Access Permission
You can set your access configuration by clicking on the following button:
You will see a dialogue where you'll be able to add or remove users, groups, departments, projects, and events. Start typing a person's name (or department/group/event/project name) and select your user.
Once you're finished, click the following button: 
You can constantly change access permission settings for your resources. Try to always keep the right level of authorization and ensure that your resources are shared with the right people within your organization. In general, you need to give 'Administrator' permission only to those users who need to manage your resources. You can share your resources with groups, add them to events or projects, or simply grant an access right to people from a specific department. In case you want everyone in your organization to have access to your resource, simply enable the following option:
This will ensure that absolutely everyone can view the resource. However, if you need your resource to appear on a group/department/event/project resource page, you need to add this group/department/event/project separately.
Mandatory Business App Execution
In case you need to make it mandatory for some people to execute your business app, use the following configuration. Click the following button: 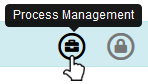
You can now indicate which users must execute your app by selecting users as shown below: 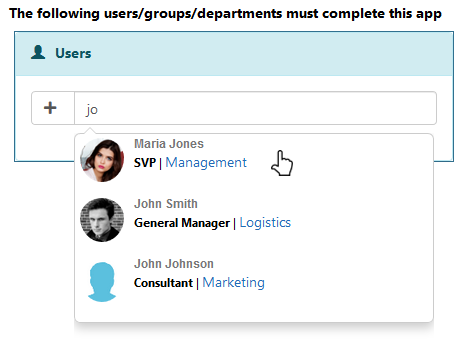
You can apply the same method for indicating which departments and groups must execute your business app.
There are optional settings for restricting how many users can execute the app. Enable the following in case you need only one user to execute the app (meaning if one user has completed the app, others will not be able to run it):
Alternatively, you can limit what each user can run the app only once:
Please note: all users/groups/departments will be automatically granted access to this app. Everyone will also automatically receive a notification when the app becomes available. The app will be considered complete only if all specified users/groups/departments have completed it. In case you have 'optional' users, you can list them at the Access Control section (covered in the next section).
Triggers
In some cases you will need your app to be initiated, or triggered, to be executed. Consider the following scenario. A department manager needs her subordinates to execute their end-of-the-month sales business app. The app is requesting the salespeople to indicate what they have achieved, what is still left for the next month, and why did some order has failed. However, it is not practical to schedule the execution of this app at the end of the month and the manager needs to do this manually. She wants to say 'hey guys, now it's time to execute this app'. That's why Fenorri provides triggers. That means, once a business app is triggered, everyone who is listed to execute it, will get a notification 'Please run this app'. It's an effective way to coordinate business app execution in an organized manner.
Create a Business App Trigger
To configure your app to have triggers, open the business apps editor and click the following button:
Then click on 'How':
Make sure that 'Manually' is selected inside the option that tells how will this app be triggered. Start typing in user names in the following area:
These users will be able to initialize the app, meaning that only they will have the ability to click the following button: 
Save your business app. Your trigger should be functional now.
Run a Business App Trigger
You can initiate a business app by opening the business apps page:
Click the following button:
Then initiate your business app by pressing the following button:
In some cases, you will not be able to trigger a business app. For instance, you might see the following message:
That means this business app needs to be configured inside the business apps editor. Someone with admin access rights needs to open it and then configure the app to be triggered by certain people, including your name on it. You might also see the following message:
This means the app is configured to be triggered, but you are not on the list of users who can trigger it. Someone needs to configure it to have your name on that list.
Was this article helpful?